
Last Wednesday, we explained how to create a Facebook Page for those starting an online business. This Wednesday, for those who have already created a Page, we’re covering how to appoint a Page Admin and adjust the Page’s basic settings. Those who want to learn how to appoint a Page Admin can follow the steps below.
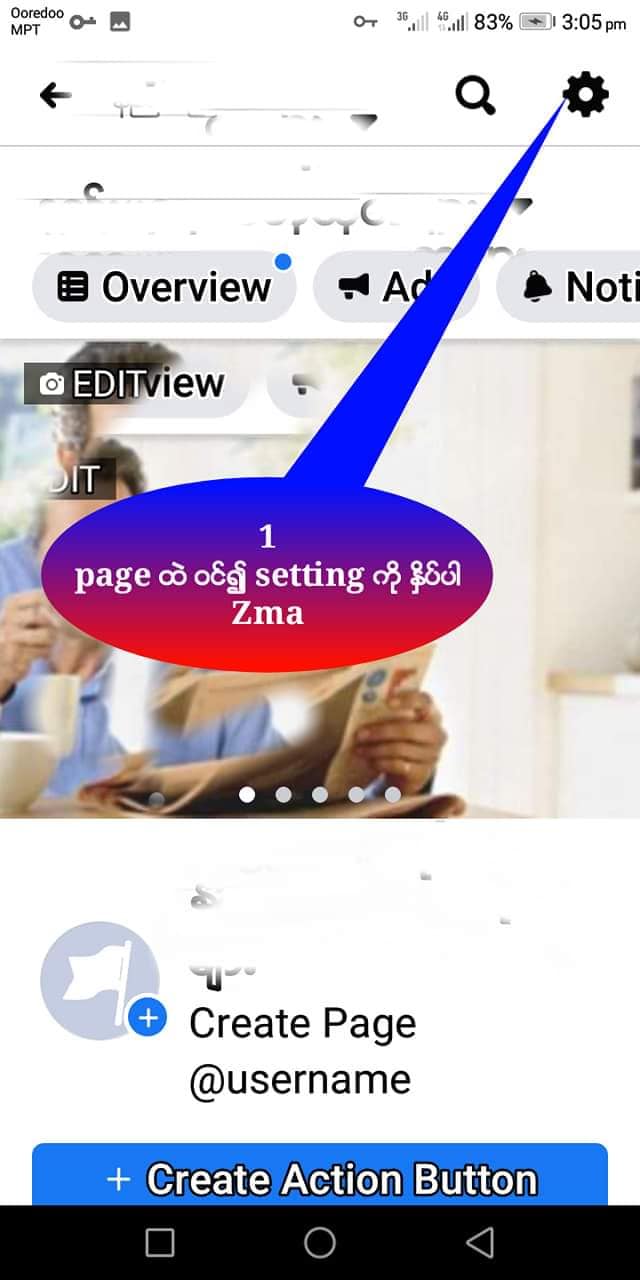
(1) Go into your Page and click Page Setting.
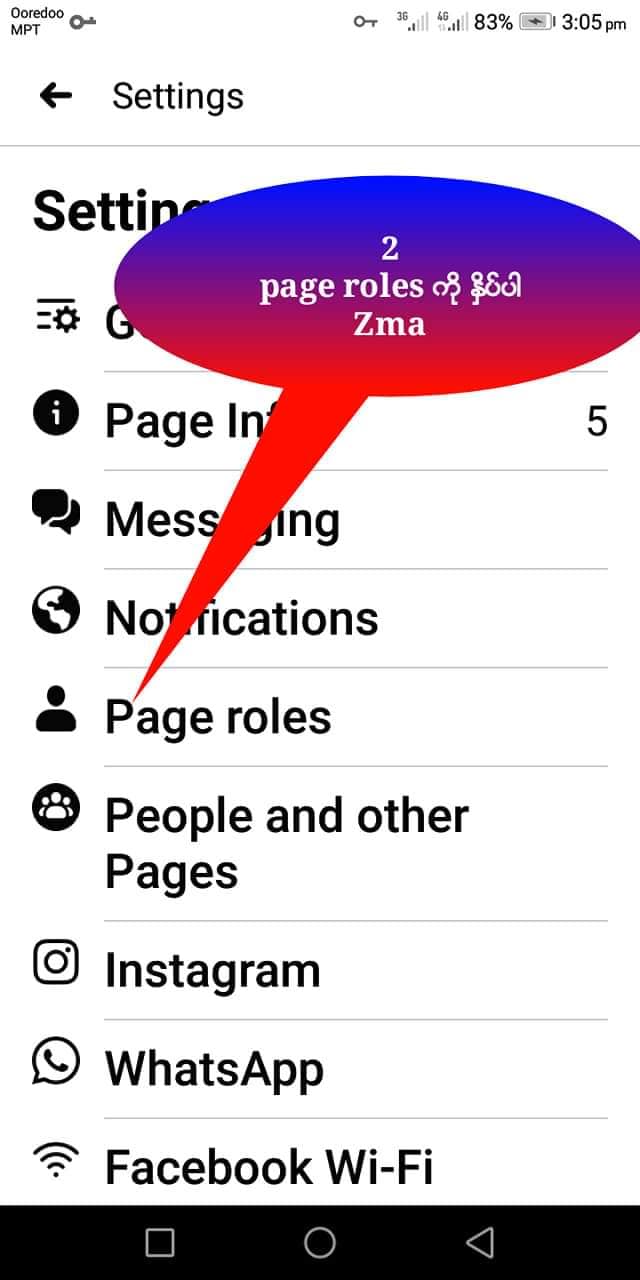
(2) Click Page Roles.
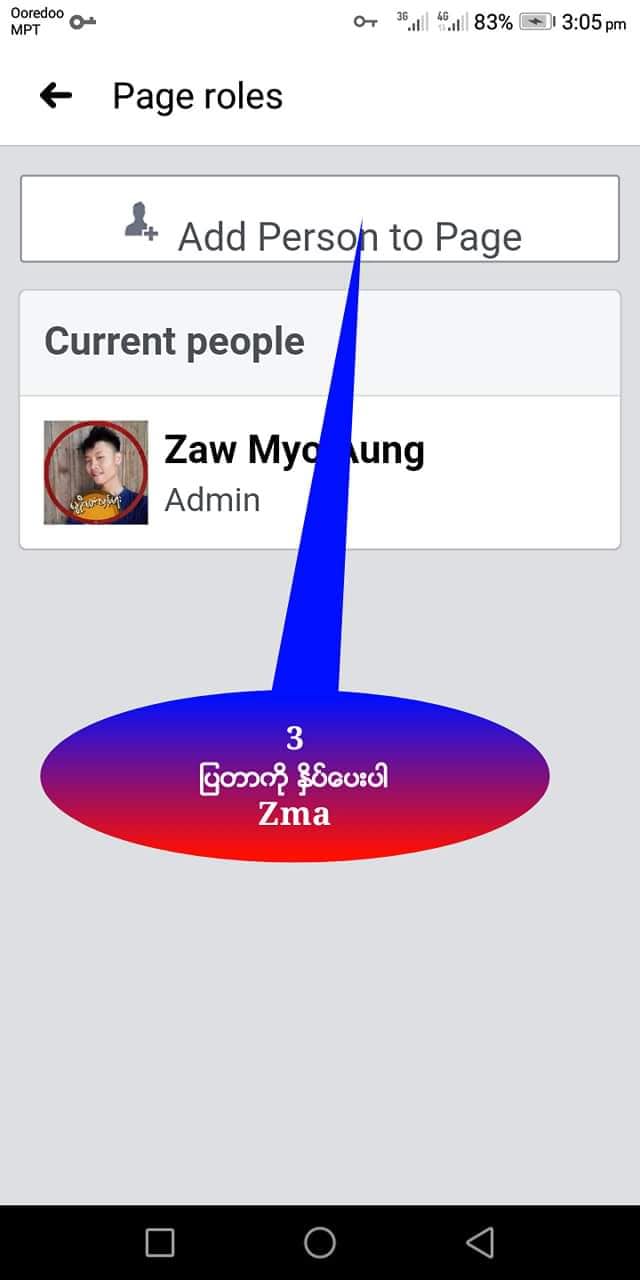
(3) Click Add Person to Page.
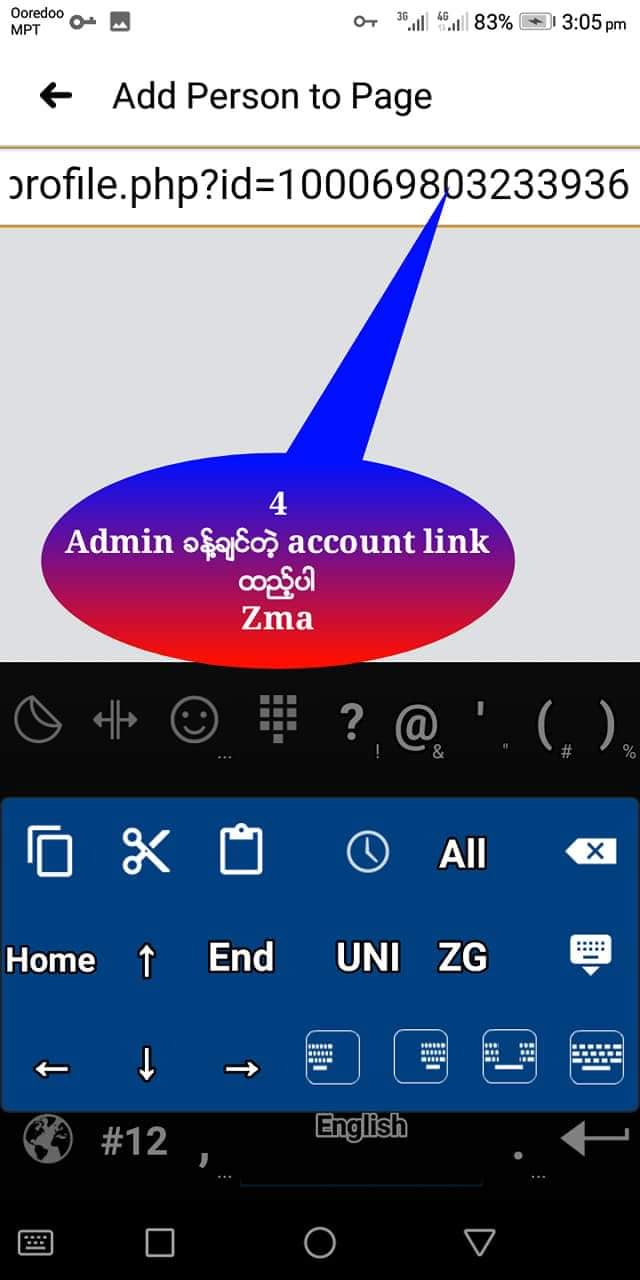
(4) Enter the Facebook account link of the person you want to appoint as Admin.
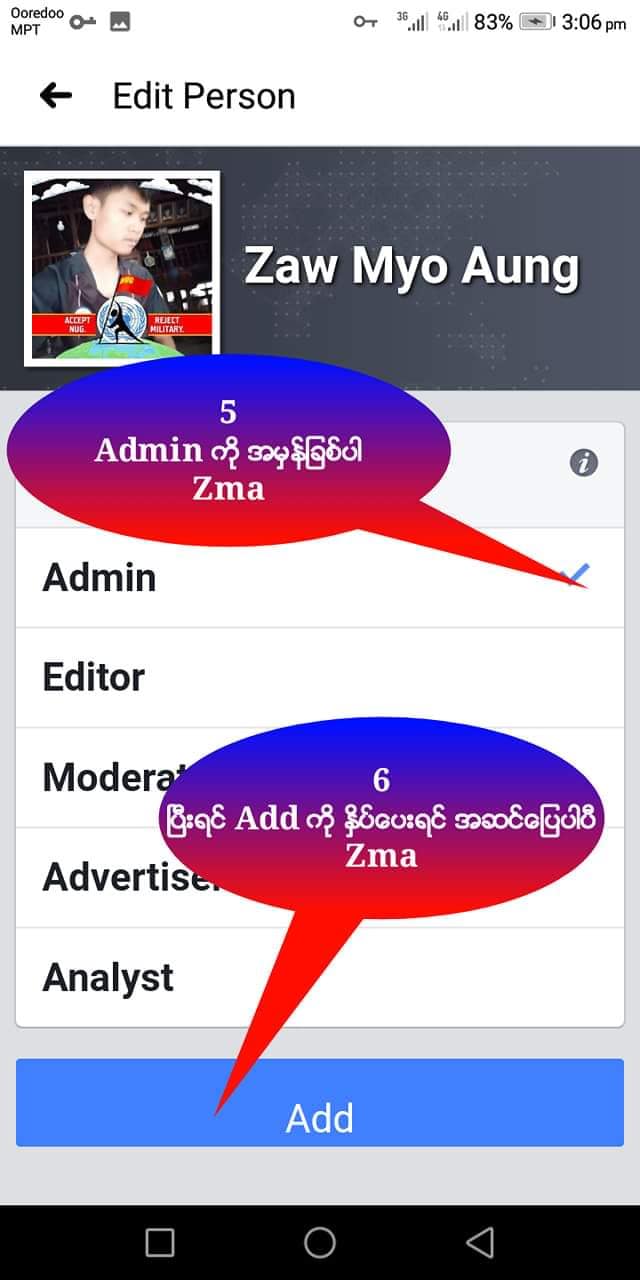
(5) Click Admin from the options that appear below. Once you click Add, the person is appointed as Admin.
Here’s a step-by-step guide to adjusting the Page’s basic settings as well.
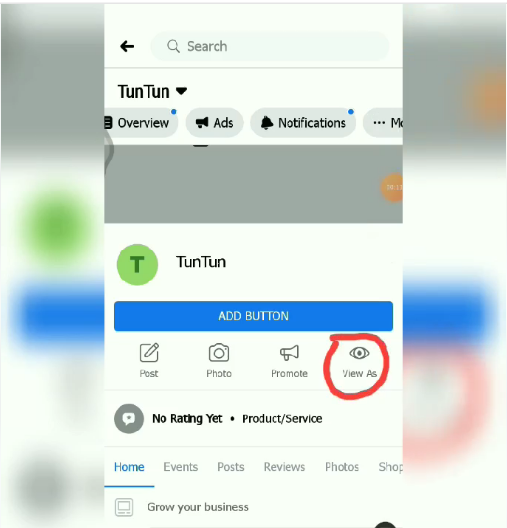
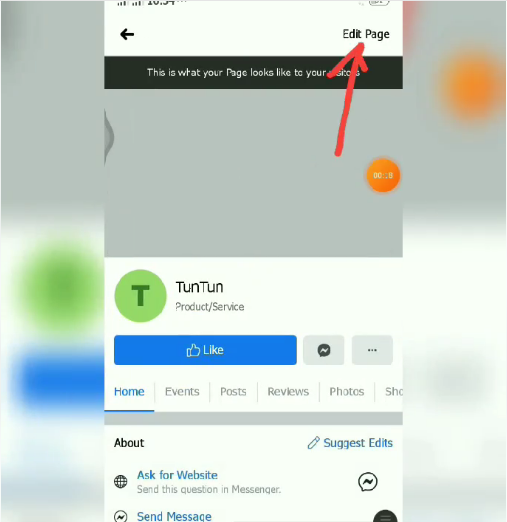
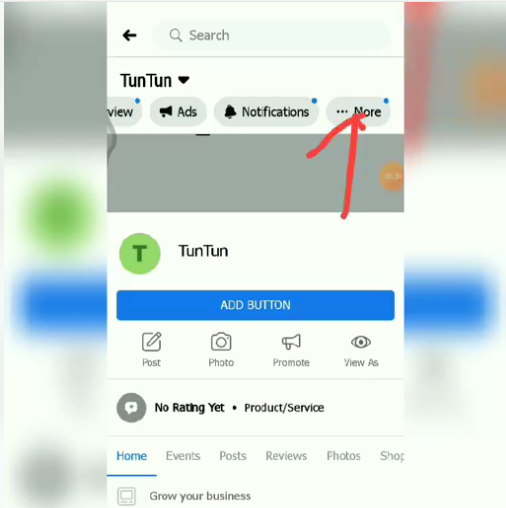
(1) To adjust the basic settings, you can go through View As on your Page, or you can adjust the settings by going through Edit Page at the top.
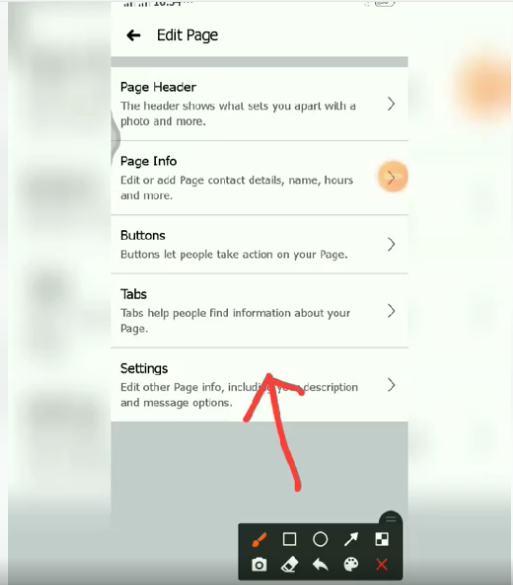
(2) If you go through Edit Page, you’ll click on Setting as shown below. If you go through View As, click More at the top and continue on to settings from there.
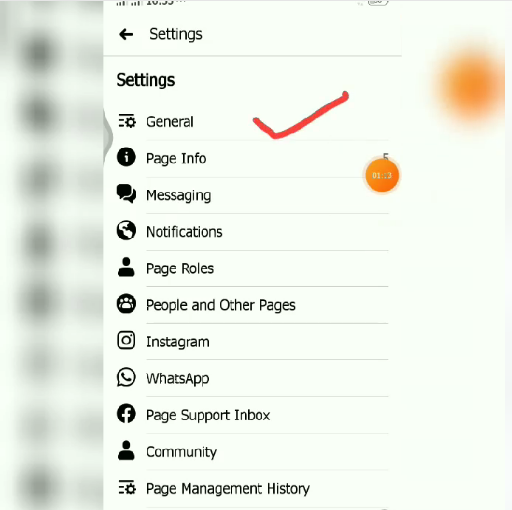
(3) Whether through View As or Edit Page, once you’re in Setting, go to General.
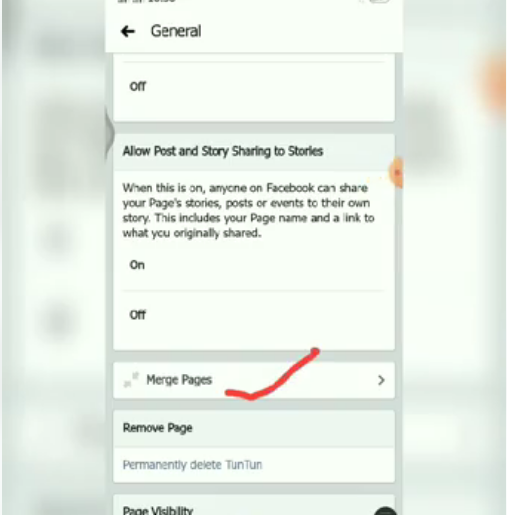
(4) Once inside General, you can turn Messenger on or off. Next, Merge Pages is used to combine two Pages that share the same name.
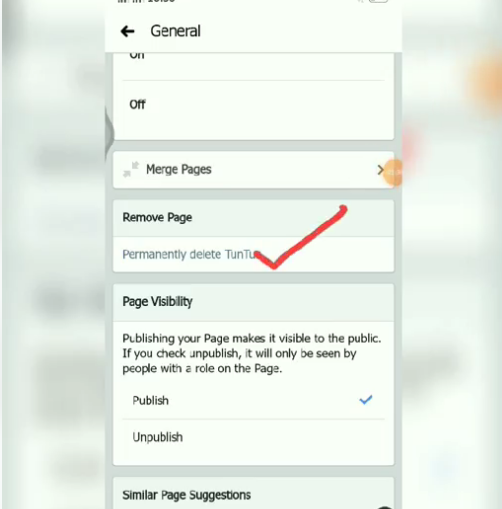
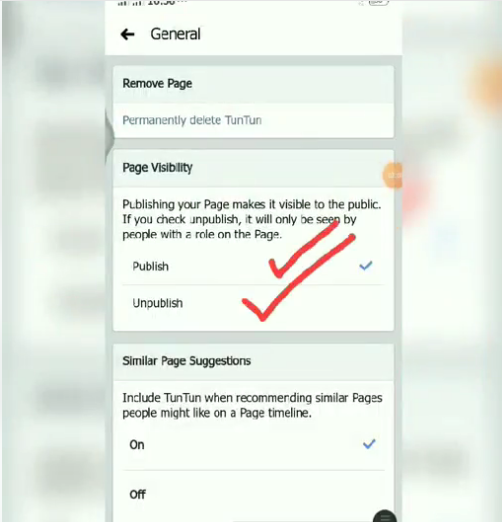
(5) Remove Page is for those who want to delete their Page. Further down, you’ll find Publish and Unpublish, which let you make your Page visible to the public or hide it from view.
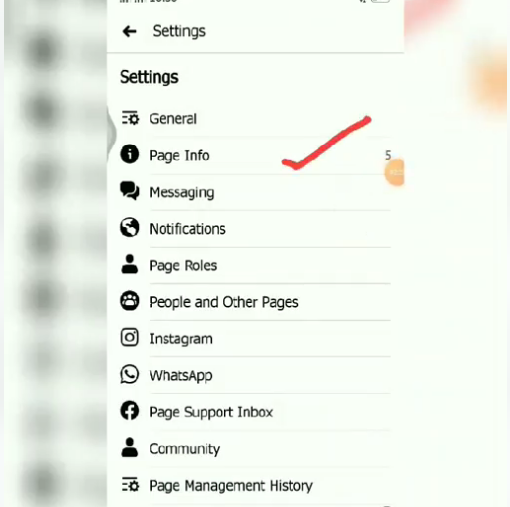
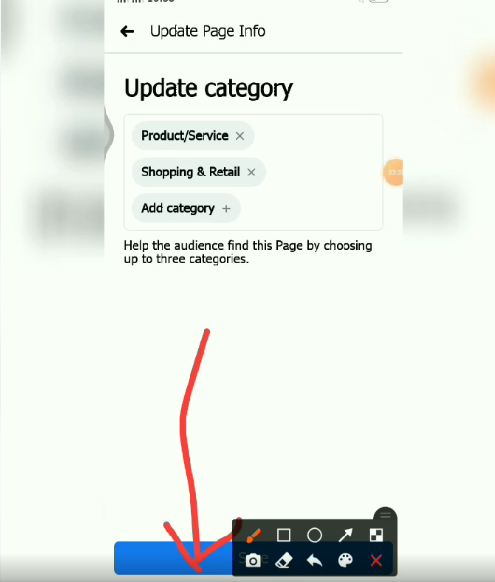
(6) Once you go back out of General, click Page Info. Page Info includes your Page’s name, the services your Page offers, and your Page’s phone numbers. If you want to add more services for your Page, you can select Add Category under Update Category. Once done, simply click Save at the bottom.
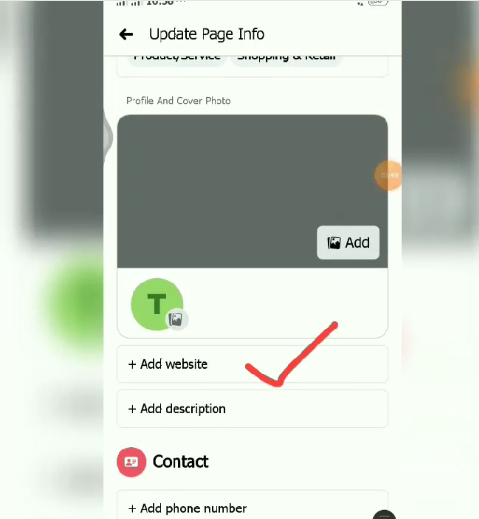
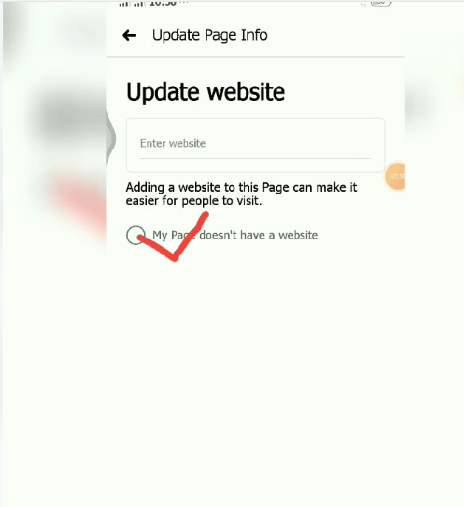
(7) Right below that, you’ll see Add Website. If you have a website, you can enter it there; if not, simply tick “My Page doesn’t have a website” and click Save.
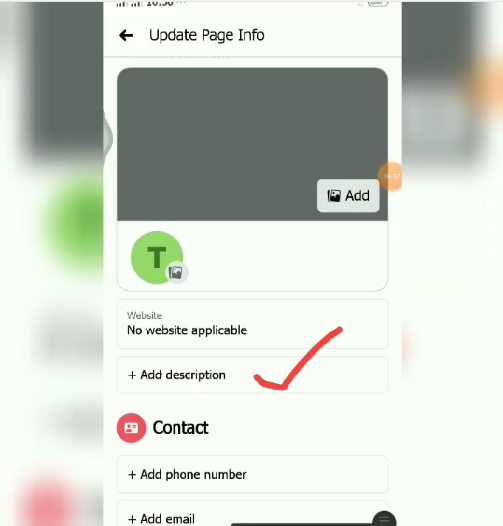
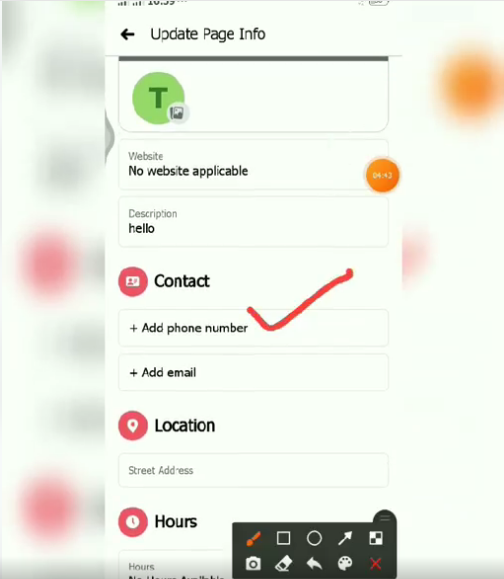
(8) Next is Add Description, where you write about your Page. Enter what your Page does and click Save. After that, all that’s left is to fill in your phone number, email address, the location where you provide your services, your Page’s opening and closing hours, and click Save.
The above covers how to appoint a Page Admin and adjust your Page’s basic settings. Every Wednesday, we’ll continue to cover, in detail and with screenshots, how to handle whatever your Page needs, so stay tuned.